Adding music to your project
Upload custom music or add music from our royalty-free collections library, curated specifically for spoken content and podcasts.

This guide will walk you through the process of adding custom music and utilizing tracks from our music collections library.
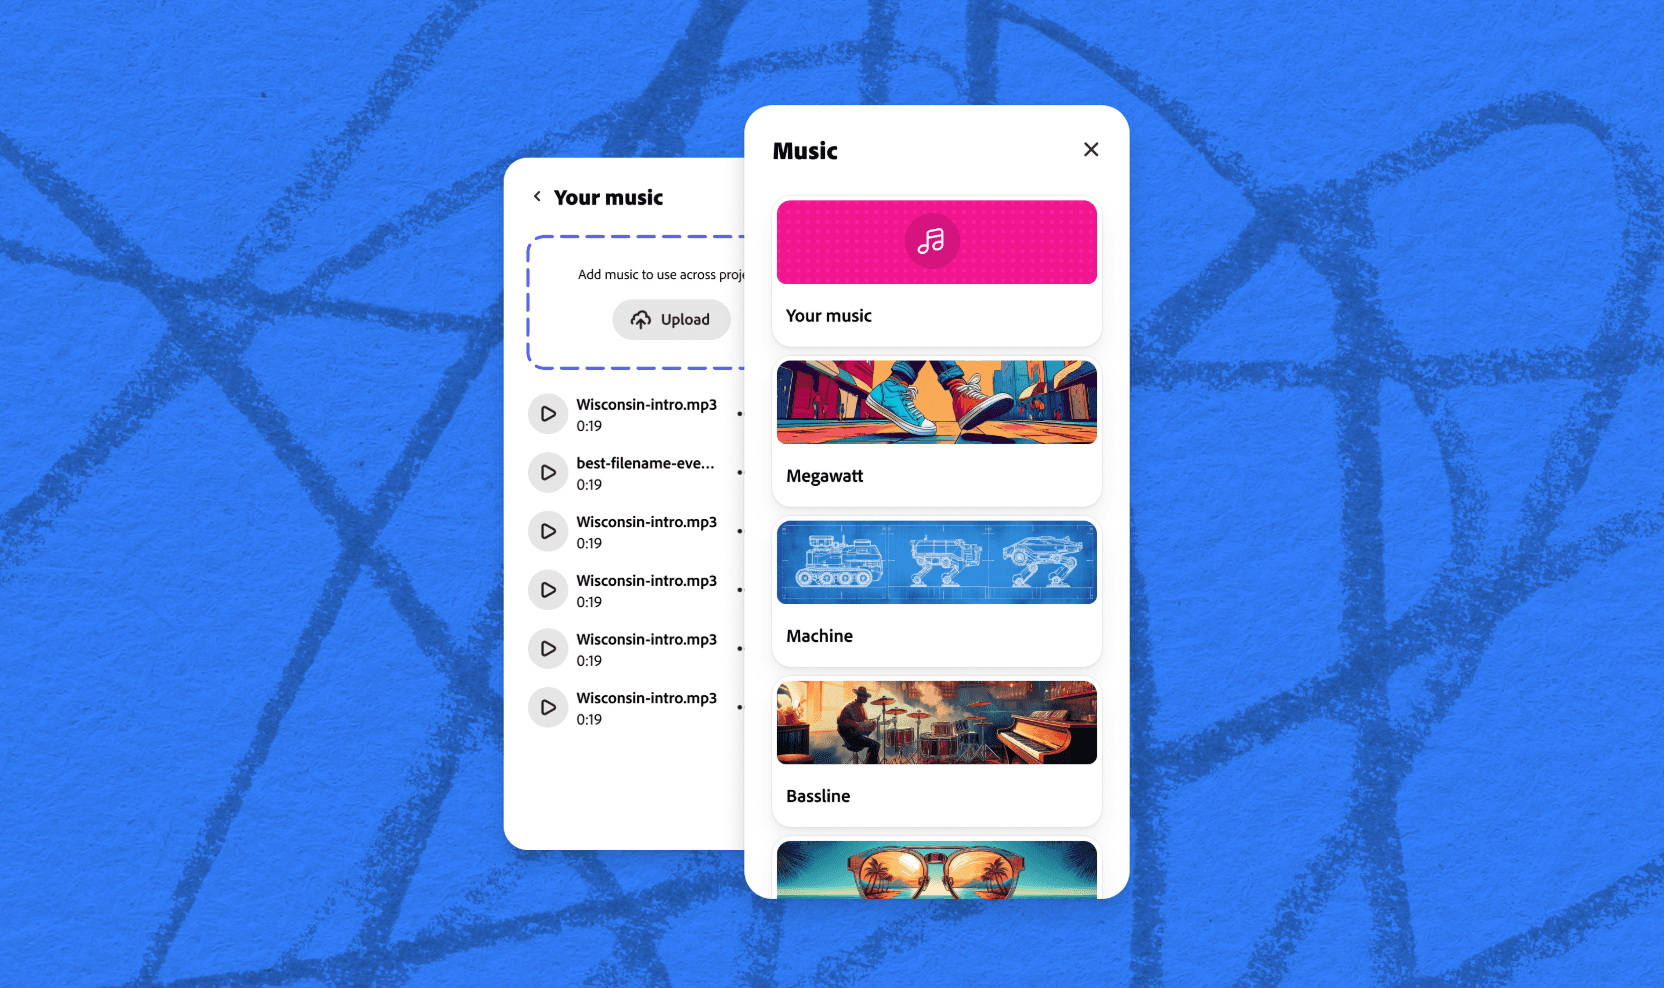
Music
In Adobe Podcast Studio, you have a ton of flexibility when working with music in your projects.
You can upload custom music or add music from our royalty-free collections library, curated specifically for spoken content and podcasts.
Music collections
There's a wide variety of thoughtfully curated, royalty-free music just for you.
Click on the Music icon.
Select one of the collections, and you'll be presented with four different categories:
- Intros: opening musical segments at the beginning of a project.
- Outros: concluding musical segments at the end of a project.
- Transitions: musical elements that will smoothly bridge different segments together.
- Backgrounds: background music that is played softly underneath dialogue, narration, or other primary audio elements.
To ensure you're using the perfect music, use the play button to listen to each option.
Once you're happy with your selection, click on the + button to insert the music wherever your cursor is in the transcript. Don’t worry – if it ends up in the wrong spot, you can always move it around by clicking on the left handlebar and dragging it to the perfect spot.
Uploading custom music
If you have your own custom music collection, or just a few tracks you'd like to reuse across projects, follow these steps.
Click on the Music icon, and select Your music.
To add a new file to Your music, you can:
- Drag it straight from your computer.
- Select Upload, choose the file you wish to upload, and select open.
Once you've added your file(s), you can use the play button to listen to each track. If you want to remove one of the tracks, click on the three dots and select delete.
When you're ready to add a track to your project, click on the + button to insert the music wherever your cursor is in the transcript.
Once the file has been added, you can:
- Move (drag) it to a different point in time in your primary recording.
- Split the file into separate clips and re-arrange as needed.
- Fade in
- Fade out
- Set as background (this is great for background music and will play the file at a low volume simultaneously with any content below it).
- Delete
Now, head over to Studio and start adding music to your masterpiece.


